首先我们看一下Channel有哪些子类:

常用的Channel有这四种:
FileChannel,读写文件中的数据。
SocketChannel,通过TCP读写网络中的数据。
ServerSockectChannel,监听新进来的TCP连接,像Web服务器那样。对每一个新进来的连接都会创建一个SocketChannel。
DatagramChannel,通过UDP读写网络中的数据。
Channel本身并不存储数据,只是负责数据的运输。必须要和Buffer一起使用。
获取通道的方式
FileChannel
FileChannel的获取方式,下面举个文件复制拷贝的例子进行说明:

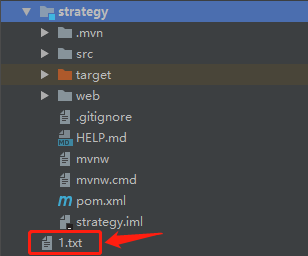
首先准备一个”1.txt”放在项目的根目录下,然后编写一个main方法:
public static void main(String[] args) throws Exception {
File file = new File("1.txt");
FileInputStream inputStream = new FileInputStream(file);
FileChannel inputStreamChannel = inputStream.getChannel();
FileOutputStream outputStream = new FileOutputStream(new File("2.txt"));
FileChannel outputStreamChannel = outputStream.getChannel();
ByteBuffer byteBuffer = ByteBuffer.allocate((int)file.length());
inputStreamChannel.read(byteBuffer);
byteBuffer.flip();
outputStreamChannel.write(byteBuffer);
outputStream.close();
inputStream.close();
outputStreamChannel.close();
inputStreamChannel.close();
}
|
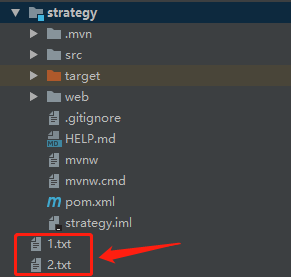
执行后,我们就获得一个”2.txt”。执行成功。

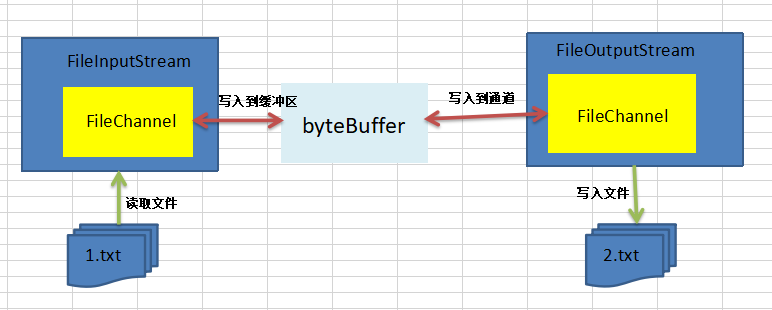
以上的例子,可以用一张示意图表示,是这样的:

SocketChannel
接下来我们学习获取SocketChannel的方式。
还是一样,我们通过一个例子来快速上手:
public static void main(String[] args) throws Exception {
ServerSocketChannel serverSocketChannel = ServerSocketChannel.open();
InetSocketAddress address = new InetSocketAddress("127.0.0.1", 6666);
serverSocketChannel.bind(address);
ByteBuffer byteBuffer = ByteBuffer.allocate(1024);
while (true) {
SocketChannel socketChannel = serverSocketChannel.accept();
while (socketChannel.read(byteBuffer) != -1){
System.out.println(new String(byteBuffer.array()));
byteBuffer.clear();
}
}
}
|
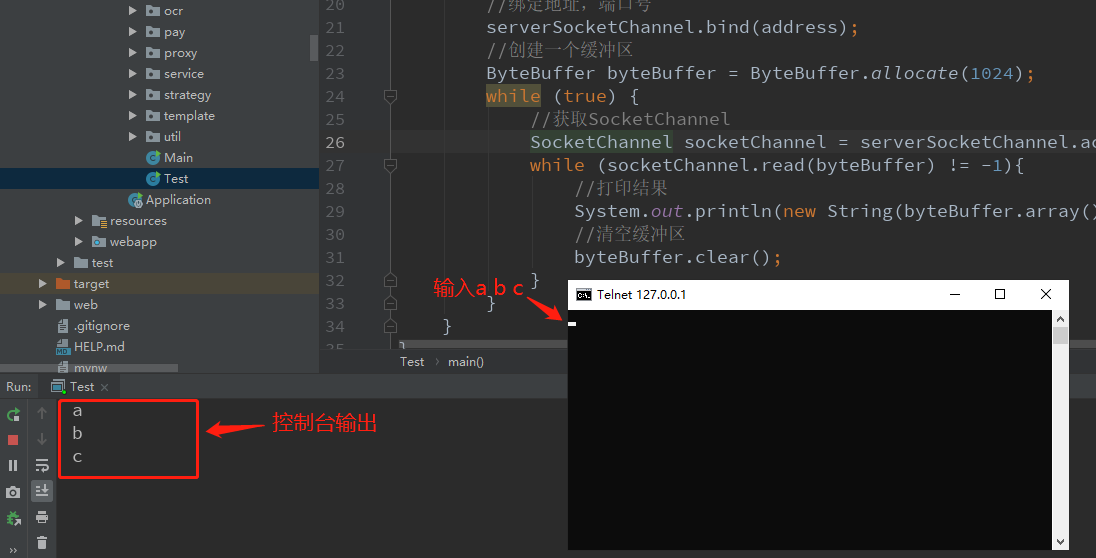
然后运行main()方法,我们可以通过telnet命令进行连接测试:

通过上面的例子可以知道,通过ServerSocketChannel.open()方法可以获取服务器的通道,然后绑定一个地址端口号,接着accept()方法可获得一个SocketChannel通道,也就是客户端的连接通道。
最后配合使用Buffer进行读写即可。
这就是一个简单的例子,实际上上面的例子是阻塞式的。要做到非阻塞还需要使用选择器Selector。


